Advanced Member chingchong Posted September 21, 2012 Author Advanced Member Report Share Posted September 21, 2012 update on the old man-head. now he has also a body. that mud2-brush is really the best brush, dont even need crease from LC. Body is about 800k tris now. head also 800k Quote Link to comment Share on other sites More sharing options...
Advanced Member chingchong Posted October 8, 2012 Author Advanced Member Report Share Posted October 8, 2012 A Fan-art for famous Adventure Game Series "Broken Sword", Rendered in Blender Cycles 1 Quote Link to comment Share on other sites More sharing options...
Advanced Member chingchong Posted October 13, 2013 Author Advanced Member Report Share Posted October 13, 2013 (edited) trying to improve my 2D skills , little sketching while watching "The Mentalist" season 6, (which ended as "reference" for sketching) inspired by this thread http://www.polycount.com/forum/showthread.php?t=91898, (noticable progress) ..... i also share same problem, lacking in painting/ sketching . (hopefully there will be some progress for me too.) Hope you dont mind, if im putting also 2d pics here Edited October 13, 2013 by chingchong Quote Link to comment Share on other sites More sharing options...
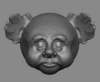
Advanced Member chingchong Posted October 19, 2013 Author Advanced Member Report Share Posted October 19, 2013 Trying out Artmans presets, (Thank you very much, your presets gave me back faith in sculpting abilities of 3DC) Just a regular guy, based on bust of 3DC I experienced one problem, how can i adjust the distance between the eyeballs? They are in one layer with symetry on. Quote Link to comment Share on other sites More sharing options...
Contributor BeatKitano Posted October 19, 2013 Contributor Report Share Posted October 19, 2013 Use pose tool, select object option, and use X axis. 1 Quote Link to comment Share on other sites More sharing options...
Advanced Member chingchong Posted October 19, 2013 Author Advanced Member Report Share Posted October 19, 2013 Use pose tool, select object option, and use X axis. Thank you very much Quote Link to comment Share on other sites More sharing options...
Contributor Tony Nemo Posted October 20, 2013 Contributor Report Share Posted October 20, 2013 Nice head, full of character but he looks like he's wearing a rug. Quote Link to comment Share on other sites More sharing options...
Advanced Member chingchong Posted October 21, 2013 Author Advanced Member Report Share Posted October 21, 2013 hehe yes, one of my current shortcomings in 3DC, create hair. im tried to produce the hair through a voxlayer, because i found it tiring to do so with "muscles", they always end up in the air, out of control Quote Link to comment Share on other sites More sharing options...
Advanced Member chingchong Posted October 21, 2013 Author Advanced Member Report Share Posted October 21, 2013 (edited) An old asian guy, 2million tris , 2h Man, that was fun to sculpt ... I'm lovin it ... (just upgraded last week to V4, what a difference) Thanks Andrew for programming, Artman for presets and Beat Kitano for your streams (was very instructive) Does anyone have a tip for hair-workflow? Edited October 21, 2013 by chingchong 1 Quote Link to comment Share on other sites More sharing options...
Advanced Member chingchong Posted October 22, 2013 Author Advanced Member Report Share Posted October 22, 2013 (edited) Update of my sculpt posted before Hope he looks now more Asian (besides the green Eyes of the J-Eye Shader, how can i change the iris of the shader?), I adjusted the Eyelids and Eyehole for a more asian look. Does it look asian too you? Trying to get best results for Hair, this one is a Voxlayer sculpted. @Tony Nemo: hope this time it doesnt look like a rug Edited October 22, 2013 by chingchong Quote Link to comment Share on other sites More sharing options...
Contributor Tony Nemo Posted October 22, 2013 Contributor Report Share Posted October 22, 2013 Looking good! I think it's only possible to smooth the margin of contact that will create a natural transition and it's probably best done in the Paint room with a smidgeon of transparency where the hair meets the skull. You have a natural skill with character faces. Quote Link to comment Share on other sites More sharing options...
Advanced Member chingchong Posted October 24, 2013 Author Advanced Member Report Share Posted October 24, 2013 (edited) Looking good! I think it's only possible to smooth the margin of contact that will create a natural transition and it's probably best done in the Paint room with a smidgeon of transparency where the hair meets the skull. You have a natural skill with character faces.thanks for the tipp, i'll try this.And happy birthday Tony... 7 is great number and double 7 even more... congratulations Edited October 24, 2013 by chingchong Quote Link to comment Share on other sites More sharing options...
Advanced Member chingchong Posted October 27, 2013 Author Advanced Member Report Share Posted October 27, 2013 one more head... this time i tried to catch up an african face, hope it was successful For Eyebrow, Hair and Beard i used Artmans Skin-Brushes ^^ 1 Quote Link to comment Share on other sites More sharing options...
Carlosan Posted October 27, 2013 Report Share Posted October 27, 2013 Hi Nice models ! I remember -time ago- learn something about eye shapes in a Francesco Della Ragione's post at polycount forum. The first 3 are our common sculpted shapes. The another ones are from human photos. Quote Link to comment Share on other sites More sharing options...
Contributor ajz3d Posted October 28, 2013 Contributor Report Share Posted October 28, 2013 (edited) I remember -time ago- learn something about eye shapes in a Francesco Della Ragione's post at polycount forum. The first 3 are our common sculpted shapes. The another ones are from human photos. Very interesting. Carlos, do you think you could dig out a link to this thread @ polycount? Edited October 28, 2013 by ajz3d Quote Link to comment Share on other sites More sharing options...
Advanced Member chingchong Posted October 28, 2013 Author Advanced Member Report Share Posted October 28, 2013 Thanks Carlosan Very interesting. Carlos, do you think you could dig out a link to this thread @ polycount? +1 Quote Link to comment Share on other sites More sharing options...
Carlosan Posted October 28, 2013 Report Share Posted October 28, 2013 http://www.polycount.com/forum/showpost.php?p=1737799&postcount=114 1 Quote Link to comment Share on other sites More sharing options...
Advanced Member chingchong Posted February 5, 2014 Author Advanced Member Report Share Posted February 5, 2014 http://3d-coat.com/turntableID=139163593048 some sculpting on a ancient well (without the rope yet) 1 Quote Link to comment Share on other sites More sharing options...
Contributor Malo Posted February 8, 2014 Contributor Report Share Posted February 8, 2014 Nice work. Quote Link to comment Share on other sites More sharing options...
Advanced Member chingchong Posted March 26, 2014 Author Advanced Member Report Share Posted March 26, 2014 thanks Malo tried some basic cloth simulation with "cloth tool" in 3D Coat... seems to have some potential 1 Quote Link to comment Share on other sites More sharing options...
Contributor Tony Nemo Posted March 26, 2014 Contributor Report Share Posted March 26, 2014 Okay, did you use the "Cloth" tool on any (like where the sleeves droop)? Quote Link to comment Share on other sites More sharing options...
Advanced Member chingchong Posted March 26, 2014 Author Advanced Member Report Share Posted March 26, 2014 (edited) @ Tony Nemo: yes on all cloth parts, just fiddled with the 3 parameters to get the results, sometimes i stopped sim , subdivided mesh anf started again. You can even use that tool for some baggy pockets ) Found it handy to improve my sculpts. p.s.: all cloth meshes were adjusted retopoes from the basemesh (body-sculpt). Edited March 26, 2014 by chingchong Quote Link to comment Share on other sites More sharing options...
Advanced Member chingchong Posted March 26, 2014 Author Advanced Member Report Share Posted March 26, 2014 And here with some new trousers, sticked to legs at the bottom end, also cloth simulated 1 Quote Link to comment Share on other sites More sharing options...
Contributor Tony Nemo Posted March 27, 2014 Contributor Report Share Posted March 27, 2014 Thanks for the tips! Quote Link to comment Share on other sites More sharing options...
Advanced Member chingchong Posted March 28, 2014 Author Advanced Member Report Share Posted March 28, 2014 playing with the retopo-room and cloth tool 1 Quote Link to comment Share on other sites More sharing options...
Advanced Member chingchong Posted March 28, 2014 Author Advanced Member Report Share Posted March 28, 2014 http://3d-coat.com/turntableID=139604626137 2 Quote Link to comment Share on other sites More sharing options...
Contributor Malo Posted March 29, 2014 Contributor Report Share Posted March 29, 2014 Very interesting. How long did it take to calculate? Quote Link to comment Share on other sites More sharing options...
Advanced Member chingchong Posted March 29, 2014 Author Advanced Member Report Share Posted March 29, 2014 (edited) @ Malo: I didnt stop the time, but mostly 1 minute up to maybe 5 minutes. It really depends on the distance which your mesh has to cover, and on the gravitiy parameter. (Das Unterhemd hat höchstens ne minute gebraucht, die Hose auch) For me it seems fast enough, but i havent tested other apps for that feature. One day i will try it in modo, but ive tho learn first the other parts of it ^^. Maybe its fast, because im not using a uber subdivided mesh for simulation. Im doing more subdivision only after the end of simulation as recommended in the short tool info. For now i dont see how its best to export the cloth in other apps, since a retopo of the thin cloth would be really hard and autopo doesnt do the job for me. Maybe its to thin, or maybe it needs other parameters. But now i have at least the feeling to be able to control the tool, not vice versa. Where the dead end of the workflow is, time will show ^^ Whats really cool, you can manipulate the parameter, even if you started the simulation, so you get a live update of the simulated proxymesh. Edited March 29, 2014 by chingchong Quote Link to comment Share on other sites More sharing options...
Contributor Malo Posted March 29, 2014 Contributor Report Share Posted March 29, 2014 Nice Quote Link to comment Share on other sites More sharing options...
Advanced Member chingchong Posted March 30, 2014 Author Advanced Member Report Share Posted March 30, 2014 trying to get some detailed sculpting with tools in 3DC ( Zbrush Reference -Henning Sanden http://henningsanden.com/wp-content/uploads/2014/03/Untitled-1.png) Used only Clay(Artman), Tweak,and Mud/Mud2. To this point the Mud tools are great (if not best) for detailing eyelids, hair and beard Seems quite sharp in the viewport, although they are blurred out in the lowres-render^^. 2 Quote Link to comment Share on other sites More sharing options...

Recommended Posts
Join the conversation
You can post now and register later. If you have an account, sign in now to post with your account.
Note: Your post will require moderator approval before it will be visible.